Welcome to the Basil Gardening Guide
Use the jump links in the table of contents below to immediately jump to the section you’re interested in, or scroll through and read all the information provided.
Basil Table of Contents
- History
- Germination
- Transplanting Outdoors
- Sun, Soil & Water
- Companion Plants
- Edible Landscape & Containers
- Pests & Diseases
- Harvesting
- Saving Seeds
- Additional Resources
As an Amazon Associate, GrowJourney earns from qualifying purchases. Read more: terms of service.
Section 1. Basil History (Ocimum basilicum)
Long considered the “king of herbs” by chefs, basil also bears a kingly botanical name, Ocimum basilicum. “Ocimum” means “smell,” which alludes to the herbs robust fragrance; “basilicum” is Latin for “basilikon,” which means “kingly” or “royal” in Greek. The herb and its delightful scent were long considered fit for a king’s house.
There are many different types of basil, each with distinct colors and flavors ranging from lemon to anise to cinnamon. In the United States, sweet basil (the most common basil used in western cuisines) is associated with Italian food. However, basil is believed to have been domesticated in India nearly 5,000 years ago.
As with many herbs, basil became intertwined with the religions and traditions of each culture that grew it. Basil is said to have grown on the hill where Christ was crucified and the herb is used today during the Feast of St. Basil in Greece (in honor of Basil of Caesarea). In Hinduism, basil is a symbol of love, eternal life, purification and protection, and is believed to have originally grown from the ashes of the goddess Tulasi.
Over the millennia, basil was also valued as a medicinal herb. The famed English botanist and herbalist John Parkinson (1567-1650) said basil could be used “to procure a cheerful and merry heart.” In other cultures, basil is considered both an aphrodisiac and a love potion. In Italy, sweet basil is called “bacia-nicola,” which translates to “kiss me Nicholas,” and is thought to attract husbands to wives. In Moldavia (between Russia and Transylvania), women woo men by offering a sprig of basil—if accepted, the man is destined to fall in love with the woman (which may be a blessing or a curse, depending on the outcome!).
What does modern science say about the health benefits of basil? As it turns out, the essential oils found in basil contain potent antioxidant, antiviral and antimicrobial properties. Beyond their overall contribution to good health, some research shows these essential oils also have the potential to be used in cancer treatment.
Whether you’re looking for true love, better health or a delicious meal, you can’t go wrong with basil. This potent and delicious herb has been used by cultures around the world for over 5,000 years before it arrived on your doorstep. Enjoy its delicious flavor then be sure to share your harvest and seeds with other people so the grow journey continues!

Section 2: Basil seed germination
There are two basic methods you can use to germinate your basil seeds:
- Germinate indoors: A little more time-consuming (you have to keep track of watering your seedlings & making sure they are getting enough light);
- Germinate outdoors via direct sowing into your soil: Very easy. The less time-consuming approach, but your germination rates might be lower than they would be in a controlled indoor environment and you won’t get harvests as early in the season.
We prefer to start our basil seeds indoors to get earlier harvest and more attractive, mature plants as quickly as possible. However, neither approach is “right or wrong,” so use whichever method is best for you given the amount of time you have to commit (if growing indoors, a few minutes each day), your level of gardening experience and the resources available to you.
One little known trick for growing basil is that the best looking specimens are actually 2-4 plants growing from the same spot. When you start your transplants or your outdoor seeds, go ahead and crowd them a bit and thin them to 2-8 seedlings per square foot of growing space.
Section 2a:
Option 1: Starting your basil seeds indoors

Part 1. WHEN TO START YOUR SEEDS
Find your last frost date here. 6 weeks before your last frost date is the ideal time to start your basil seedlings indoors if you want to get an early jump on the growing season.
If: a) your last frost-date has already passed, b) your soil temperatures are at least 70°F, and c) your local 10-day weather forecast does not have any temperatures forecast below 50 degrees, you’re probably better off direct-seeding your basil seeds outdoors.
Part 2. WHAT TO PLANT THEM IN
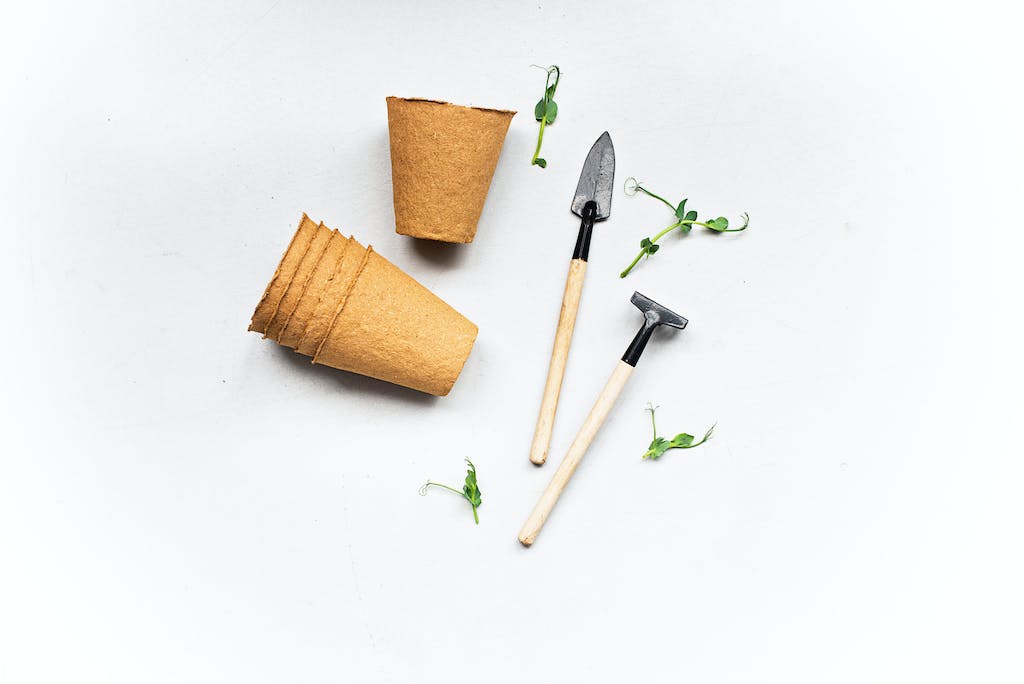
POTS: Use in biodegradable peat/paper/cow pots, reusable plastic cells (our choice, we really like these heavy-duty ones by Bootstrap Farmer), or ladbrooke soil blocks.
Sowing depth: We recommend sowing your basil seeds 1/8 – 1/2 inch deep in “clumps” of 3-4 seeds per pot, in your choice of: of organic seed starting mix or potting soil.
Do NOT fill your seed cells with soil from your garden, since this tends to harden into an impenetrable brick.
Instead, we recommend that you buy a ready-made organic seed starting mix or a light potting mix like Fox Farm potting soil. Experienced gardeners or gardeners starting large numbers of plants often prefer to mix their own seed starting mix. If you want to make you own seed starting mix, here’s our recipe.
Seedling labels – Don’t forget to label your basil seedling pots using plant markers so you can keep track of each variety from seedling to harvest.


Part 3. GERMINATING CONDITIONS
WARMTH: The ideal temperature range for basil seed germination is 70°-95°F.
Place your seed trays in a warm spot in your home (such as a sunny window). OR for best results, use a seed heat mat (which is also very helpful for starting other summer seeds like tomatoes, eggplants, peppers, etc.). We have significantly better germination with our summer seeds when using a heat mat.
basil germination time: If the soil is kept damp and temps are kept between 70° – 80°F, your basil seedlings will germinate within about 5 days. If the temperatures are much cooler than this, your seeds may take an additional 1 – 2 weeks to germinate or not germinate at all.
WATER:
To help with germination, make sure your seed containers stay moist, but not wet. The moisture level should feel like a well wrung-out sponge.
Also make sure to use a gentle watering method such as a misting bottle or a watering can with a very soft pour to prevent the seeds and soil from becoming dislodged. It’s important that your soil mix be thoroughly moistened BEFORE your seeds are added, or you’ll have difficulty getting the soil moist without dislodging the seeds.
The frequency you’ll need to water your seedlings on an ongoing basis varies. Start by watering your seed containers every 24 hours unless they stay really damp. If that happens, hold off and check on them again in a few hours.
Note: The soil will dry out faster on seedling heat mats or under hot lights.
Again, go for the happy medium of soil with a similar dampness as a wrung-out sponge. Seeds allowed to sit in puddles quickly rot whereas tiny seedlings in crusty, dry soil will soon die due to lack of moisture.
Part 4. ONCE YOUR basil SEEDS HAVE SPROUTED
INDOOR LIGHT:
As soon as your seeds have germinated/sprouted above the soil surface, place them in front of a sunny, south-facing window in your home (e.g. the window that gets the most sunlight throughout the day).
Newer, modern windows block a lot of the light spectrum that plants need to grow, so if you have energy-efficient windows, you might want to consider getting grow lights. Here’s how to build your own DIY grow light system.
It’s crucial that your basil seedlings get adequate light—an absolute minimum of six hours of direct light daily—otherwise they’ll quickly become weak and “leggy” (tall and spindly).
Tip: If growing in front of a window, periodically turn your seed trays so that the same side is not always facing towards the sunny window—this will prevent the side furthest away from the window/sun from getting leggy or stretching sideways towards the light.
OUTDOOR LIGHT:
When the daytime temperatures begin to get into the mid-60s, you can start putting your basil seedlings outside in direct sunlight. However, if you don’t “harden off” your seedlings before exposing them to direct, unfiltered sun, you risk them becoming sunburned.
You can read more about how to harden off your seedlings in the Transplanting Outdoors section below.
Part 5. FEEDING YOUR basil SEEDLINGS:

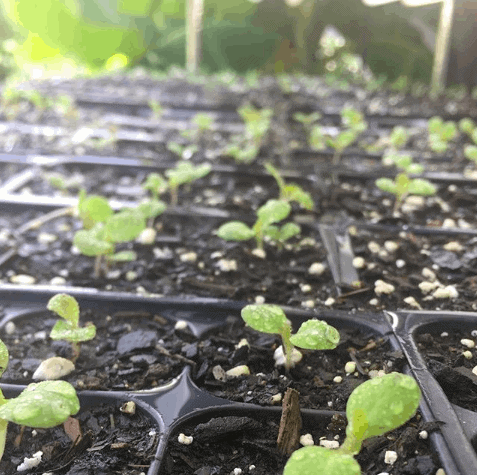
The first two leaves on your basil seedlings are called “cotyledon” leaves. The next leaves that develop are the first set of “true leaves.”
About 7-14 days after germination, your basil seedlings will get their first true leaves. At this point, you’ll need to consider nutrition, depending on whether your seed starting mix did or did not contain nutrition.
When/if your seedlings need nutrition (yellowing leaves or stunted growth are sure signs), you’ll want to start using an organic liquid fertilizer 1-2 times per week. (We like liquid kelp fertilizer.) Dilution ratios vary from product to product, but watering at half-strength (half of what the
bottle recommends for feeding mature plants) is a good rule of thumb for seedlings.
Be aware that over-fertilizing your plants can make them extra attractive to pest insects like aphids which can proliferate rapidly indoors since no predatory insects are around!
Next, keep a close eye on your basil seedlings to make sure they stay healthy: well-sunned, well-fed and well-watered until your last frost date has arrived. You’re almost ready for transplanting!


Section 2b.
Option 2: Starting your basil seeds outdoors / direct sowing
 click to enlarge
Part 1. PLANTING
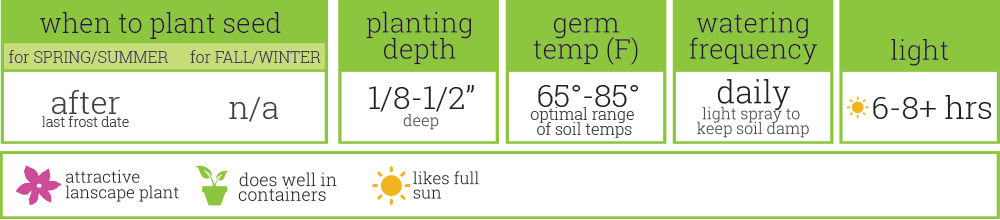
Basil is a heat-loving summer annual. By starting your seeds outdoors, you won’t get harvests as early as you will if you start your seeds indoors then transplant them out. If you decide to direct sow your basil seeds outdoors, sow them on or after your last frost date once you’ve looked at your 10 day weather forecast to ensure that there are no temperatures below 40 degrees in your forecast.
Planting: for greatest harvest (as in rows)
- Seed Depth: Sow each seed about 1/8 – 1/2″ deep.
- Distance Between Seeds: Sow your basil seeds about 6 inches apart.
- Rows: If you’re growing your basil in rows, space each row about 24 to 36 inches apart. If you want to grow more basil and you have limited space, you can also grow your basil in 3 rows 12 inches apart with 12 inches between rows.
Planting for the greatest visual impact (as in a edible landscape)
Not only is basil delicious, it is also very handsome when used in mass plantings. One little known trick for growing basil is that the best looking specimens are actually 2-4 plants growing from the same spot. When you start your outdoor seeds, go ahead and crowd them a bit and thin them to 2-8 seedlings per square foot of growing space. As the plants grow in, no one will be able to see the extra stems underneath the tantalizing thick hedge of leaves and they’ll just assume you have a magic touch at growing lush basil.

Section 3: Transplanting basil Outdoors
If you started your basil seeds indoors, see the below instructions for a general hardening off schedule. If you germinated your seeds outside in your garden, you can skip this section and go to the Sun, Soil and Water section.
Part 1. HARDENING THEM OFF:

Outdoor direct sunlight is always more intense than either indoor grow lights or light filtered through a window.
Many new gardeners make the mistake of immediately transplanting their seedlings outdoors into direct sunlight before “hardening” them off. This mistake can cause extreme sunburn that severely damages or kills your plants.
To be safe, plan to harden off your basil seedlings outdoors over the course of a week as follows:
- Days 1-3: Place your basil seedlings outdoors in a shady spot that will only get 3-5 hours of direct sunlight throughout the day.
- Days 4-5: Place your seedlings in a slightly sunnier spot that will get about 5-6 hours of direct sunlight.
- Days 6-7: Place your seedlings in a full sun spot (6+ hours of direct sunlight).
Water – If your seedlings’ leaves appear limp, this is likely due to lack of water. Try to keep their soil moist, but not wet.
Sunburn – If you notice your seedling leaves beginning to look white and papery, they’ve gotten sunburned. Put them in a part-full shade spot for a few days and allow them to recover. Again, if you don’t properly harden off your seedlings, they can get severely sunburned, which will either slow their growth to a crawl while they recover or possibly kill them (if they’re small or weak).
Cold – Also, be sure that you bring your basil seedlings inside any time the temperatures drop below 50ºF.
Part 2. PLANTING OUTSIDE:
Once the last frost date for your area has arrived and your basil seedlings are all hardened off, it’s time to plant them outdoors.
Before you start planting, make sure to look at your local 10 day weather forecast. If you see any day or night temperatures below 45°F, hold off on transplanting. This tip has saved us quite a bit of heartache over the past few years as extreme weather and temperature fluctuations have becomes the “new normal.”
Part 3. PLANTING AND MULCHING:
Basil spacing and placement.
Pay careful attention to the type of basil you’re planting when considering your basil plant spacing (distance between plants) and row spacing (distance between rows of plants). Generally, spacing plants 6″ apart, in rows 24″-36″ apart is adequate.
Planting
We know this may seem obvious to some people but you’d be surprised at how frequently new gardeners are unaccustomed to how deep or shallow to place a root ball and what constitutes real “soil” for filling in the surrounding hole…
Take a look at where your seedling decided to place its stem vs. its roots when it came up in your soil block or container. The point where the stem extends above the soil and the roots spread below it is called the “crown” of a plant. Most transplants want to be placed at approximately the same depth that they “planted themselves.” (Exceptions to this rule are plants like tomatoes, which have adventitious roots that can grow from their stems.)
Plant your basil seedlings such that the soil level in your garden is the same as the soil level in the seedling cell — not sticking above the soil level (which will cause moisture to wick out) and not below the soil level (which can cause the tender young stems to rot). Mature vining basil plants (aka winter basil) can set new roots at each new stem joint, but bushing summer basil plants do not form additional roots.
If you don’t have rich, healthy soil where you plan to grow your basil plants, consider getting worm castings and organic fertilizer to amend your soil as follows:
- Castings/compost – Dig a 1′ x 1′ hole and fill it with 50% castings and 50% garden soil before transplanting.
- Organic fertilizer – Loosen the soil in a spot about 3-4x larger than the seedling root ball. Mix in slow release fertilizer at the application rate described on the product package, then transplant the seedling into the spot.
When filling the hole back in around the root ball, the soil used should be actual soil. You should not fill the hole with recognizable chunks of mulch, kitchen scraps, leaves, lawn clippings, or other undecomposed organic matter.


Mulching
We can’t overemphasize how important top-dressing your beds with wood chips or mulch is for building and maintaining healthy soil, regulating soil moisture and temperature, and blocking unwanted plants – aka “weeds.” After you plant your basil seedlings, make sure to put at least a few inches of mulch on top of the soil surface around your plants, if it’s not already there.
Again, mulches should always remain on the surface of the soil, not against the roots of the plant (aka “top-dressing).
If you have ever heard of mulches or compost “stealing” nutrients from garden plants, mixing these items into the soil instead of letting them sit on top of the soil is what causes this problem. You can read more about your plant’s long term soil requirements in the Sun, Soil, and Water section below.
Part 4. WATERING:
Immediately after transplanting, give each newly planted basil seedlings a deep watering around the base of the plant.
Section 4: Sun, Soil, and Water Needs for basil
Sun: Basil plants thrive in full-sun spots (6-8+ hours direct sunlight per day).
Soil: Basil plants are heavy feeders that perform best in rich soil with lots of organic matter with a pH between 5.5-6.5 (most garden soil).
Five techniques that you can use to drastically improve your soil health & biological fertility are:
- “hugelkultur” (click here to read about this technique);
- polyculture plant guilds (see “Guild Plants,” the next section in this guide);
- top-dressing your soil with 3-6 inches of wood chips/mulch twice per year in the fall and spring;
- using living cover crop mixes rather than leaving your soil fallow;
- using compost from hot composting methods (Berkeley method) or worm castings. Either: a) Apply the compost/castings on top of your beds, or b) Make actively aerated compost tea (AACT) to use as a soil drench or foliar spray. (Option b gives you the most bang for your buck.) Both methods of application drastically increase the quantity and diversity of beneficial microbes in your soil and on your plants.
All five of these soil building techniques can improve your soil fertility to the point that your plants will not require any additional fertilizer and virtually no additional water throughout the growing season once their root systems get established.
We recommend that you NOT use non-organic/synthetic fertilizers as these will have a compounding harmful effect on your soil over time. Instead, plan to build your soil fertility for the long-term using techniques that build biological soil fertility.
Water:
Basil need approximately 1″ of water per week.
If your soil is healthy, your plants have established their root systems and rain is regular, you may not need to provide any additional water to your mature basil plants. If you do need to water, water deeply (shallow watering can lead to shallower root systems).
Section 5: Helpful Guild Plants/Companion Plants for basil
Definition: A plant “guild” is a polyculture plant system (multiple plant species planted together) purposefully designed to create symbiotic relationships between species, increase plant productivity and generate higher survival rates amongst the individual plants in the guild system.
If you’ve ever visited a “wild” ecosystem (mature forest or prairie), you’ve unknowingly seen plant guilds. Like people, plants tend to perform better in communities than they do as isolated individuals.
Avoid planing your basil with either rue or sage.
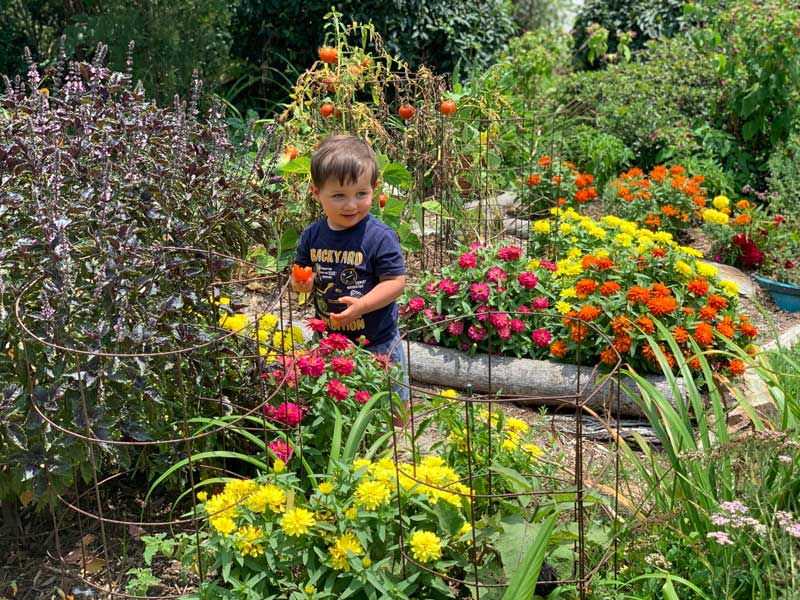
Some Common Plants to Consider in Your basil Guild:
Fruits & Vegetables
- asparagus
- grapes
- peppers
- tomatoes
- eggplant
Herbs
- chamomile
- anise
- oregano
Flowers
- petunias
- marigolds (French and Mexican)
- zinnia (plant basil as a front-row plant to these tall flowers)
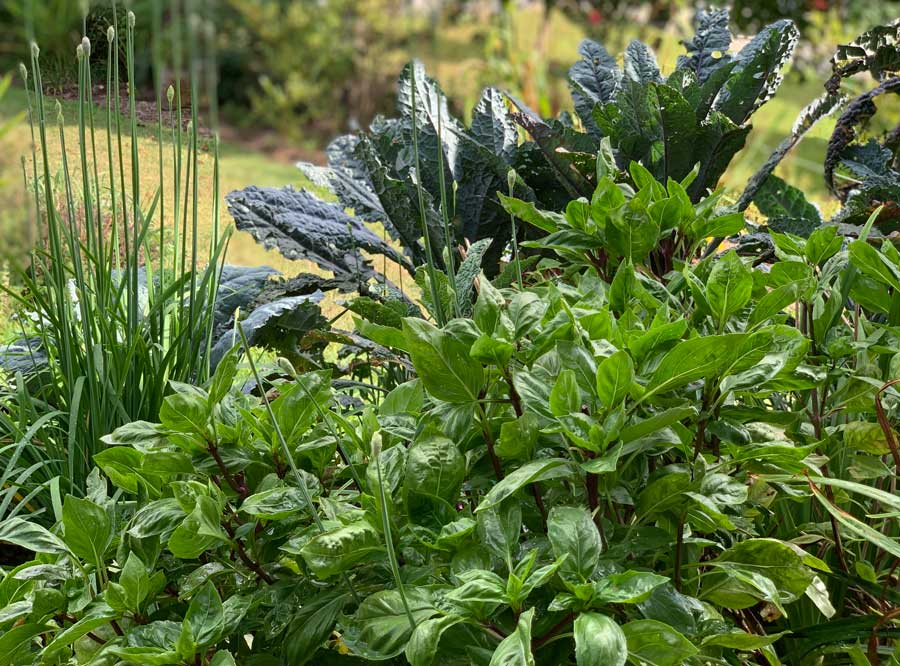
Section 6: Planting basil in Your Edible Landscape or In Containers
Be sure to read through our GrowJourney Garden Plan section to help plan your garden around seasonal sun requirements of the plants you’re choosing for your garden.
Edible landscaping with basil
Basil very handsome when used in mass plantings in the landscape. As we mentioned in previous sections, growing basil in clumps of 2-4 plants from the same spot produces a beautiful, bushy plant. When you start your transplants or your outdoor seeds, don’t be afraid to crowd them a bit and thin them to 2-8 seedlings per square foot (basil microgreens, ftw!!) of growing space. As the plants grow in, no one will be able to see the extra stems underneath the tantalizing thick hedge of leaves and they’ll just assume you have a magic touch at growing lush basil. Also, pinching the growth tips & flowers will make it even bushier and increase leaf production!
Basil is versatile and can be grown as an edging at the front of a border with taller plants in the back or as a deep green backdrop for shorter plants. We prefer to use 3-5 square feet segments (which tend to contain 12-20 individual plants spaced to look like only 3-5 plants) for our basil patches to make sure it stands out in the landscape. Basil also works really well planted at the base of other plants that benefit from having “shoes and socks” to pull together their final outfit. (When we say a plant needs “shoes and socks” in the landscape, we’re simply saying that the parts of the plant closest to the ground tend to get ragged as the season progresses so we put “shoes and socks” at their base to help cover their “feet” when they start to get ugly later in the season.)
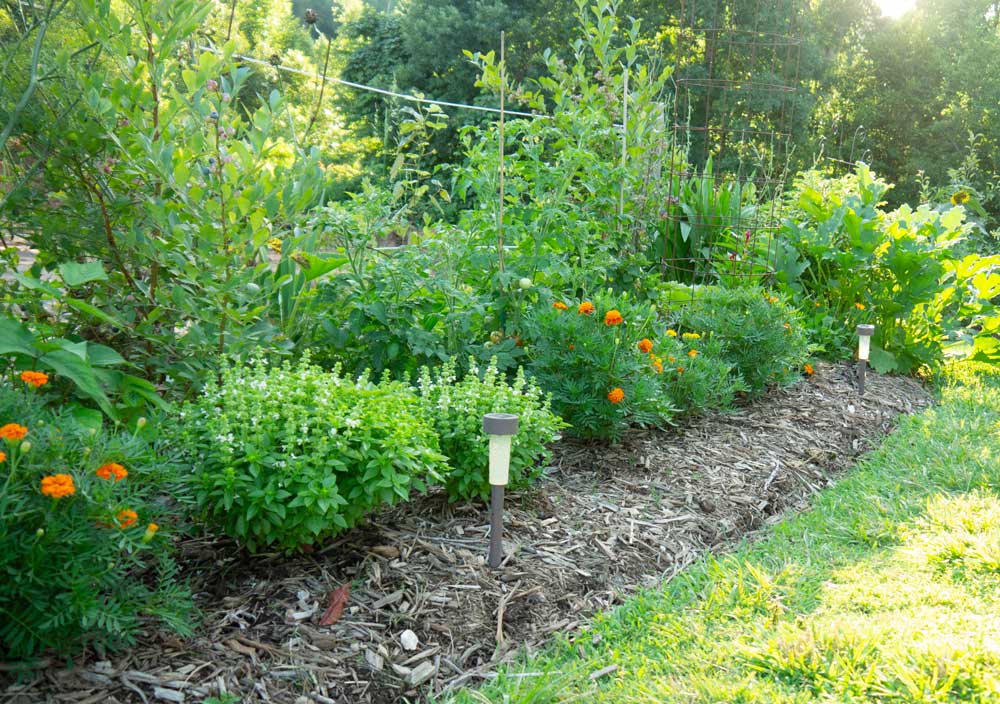
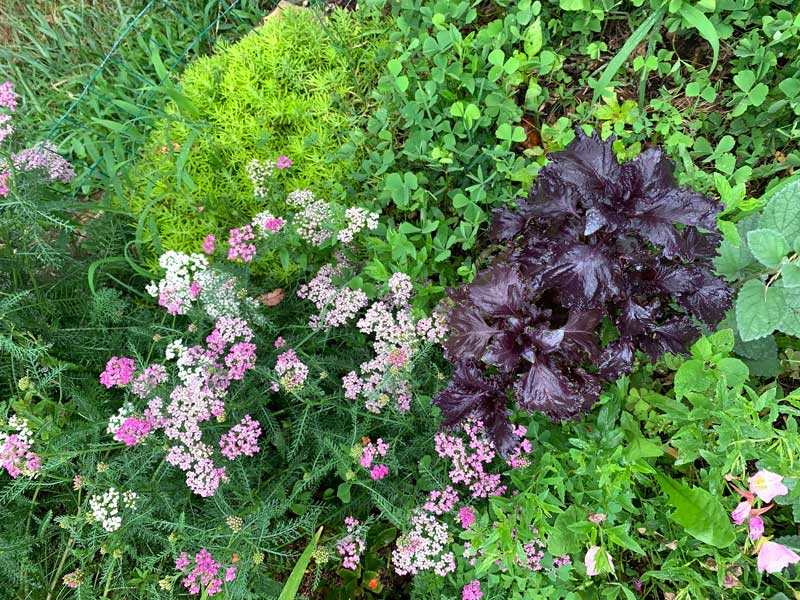
Basil seems to prefer being planted with some of the shorter summer nightshades (like colorful hot peppers) – or other basil varieties that have contrasting foliage or shapes (‘Spicy Globe’ basil, or ‘Red Rubin’ basil comes to mind). ‘Genovese’ has a neutral, bright green coloration and white to purple-tinged small flowers so it pairs well with literally any plant or edging coloration you can think up. Red basils such as ‘Rosie’ look stunning with chartruese-leafed plants, or even other green-leafed basil such as ‘lime’.
It also looks great with other herbs, especially the ones with different leaf shapes such as chives or lemongrass (lemongrass gets big so use large or multiple pots for this combo). Another option is combining basil with edible flowers such as nasturtiums, borage, or calendula. It doesn’t like “wet feet” (ie. soggy roots), so make sure to plant it in a well draining area (or container, if you’re container gardening!). That said, if the soil repeatedly dries out past the stage where it feels like a well-wrung out sponge, the basil will “bolt” (produce flowers) at the expense of leaves.
Planting basil in a Container
- Container Spacing for maximum harvest: Minimum container size – 1-5 gallons (per 1-4 plants), approx. 8-14 in. diameter, 5-14 in. deep.
What patio or windowsill decoration is more classic than a pot of fragrant basil? You can direct-sow right into the pot you plan to use and we recommend that you implement the trick of putting 2-4 seeds into the same planting hole (we suggest fewer for containers than direct sowing because of the limited space vs. an outdoor bed). When the seeds sprout, there is no need to thin since the multiple plants will share their space and create a very full, leafy “bush” that looks like it is only one plant. You can fess up and tell your admiring friends and family what you did when they exclaim how much better your basil looks than their spindly specimen or you can just let them wonder how your thumbs are so much greener than theirs.
Basil also doesn’t mind sharing space in a pot with other plants (though very large, resource hungry vegetables are likely to outcompete it for nutrients and leave you with tiny, stunted basil plants). Zone planting is a good template with basil being the taller backdrop plant. If you want to include nutrient and water hogs like indeterminate tomatoes or vining winter squash in your container garden, it’s a better idea to plant your basil in a separate pot and then group the various planters together in a complementary arrangement. Use absolutely any color or pattern of pot you like for basil since its green, chartreuse, cream, purple, or magenta leaf colors (and white, blue, lavender, maroon, or pink flowers) are incredibly versatile. White pots with a matte finish lend to an Italian or French country style while brighter patterns (such as the colorful Italian glazed ceramics) are equally authentic with far less subtlety.
The same rules apply as in the landscape, although in containers it can be even more difficult to regulate the soil moisture levels. We use drip irrigation for most of our container plants (you can read more about how we set up drip irrigation on our personal blog) and have found it makes a huge different in plant stress levels. Keep in mind that Basil doesn’t like “wet feet” (ie. soggy roots), so make sure to plant it in a well draining container mix & a container with holes. That said, if the soil repeatedly dries out past the stage where it feels like a well-wrung out sponge, the basil will “bolt” (produce flowers) at the expense of leaves. To get a good balance, use a larger container so the pot doesn’t dry out as quickly. This is especially important in hot, windy areas. Plant 2-4 basil seeds per spot (don’t thin them later) and pinch off the growing tips and flowers for a bushier appearance.
Section 7: Common Pests & Diseases of basil
During (Indoor) Seedling Stage
Indoor plants and seedlings are more susceptible to certain pests and diseases than outdoor plants. Common problems you might encounter during the germination and seedling stage of your basil:
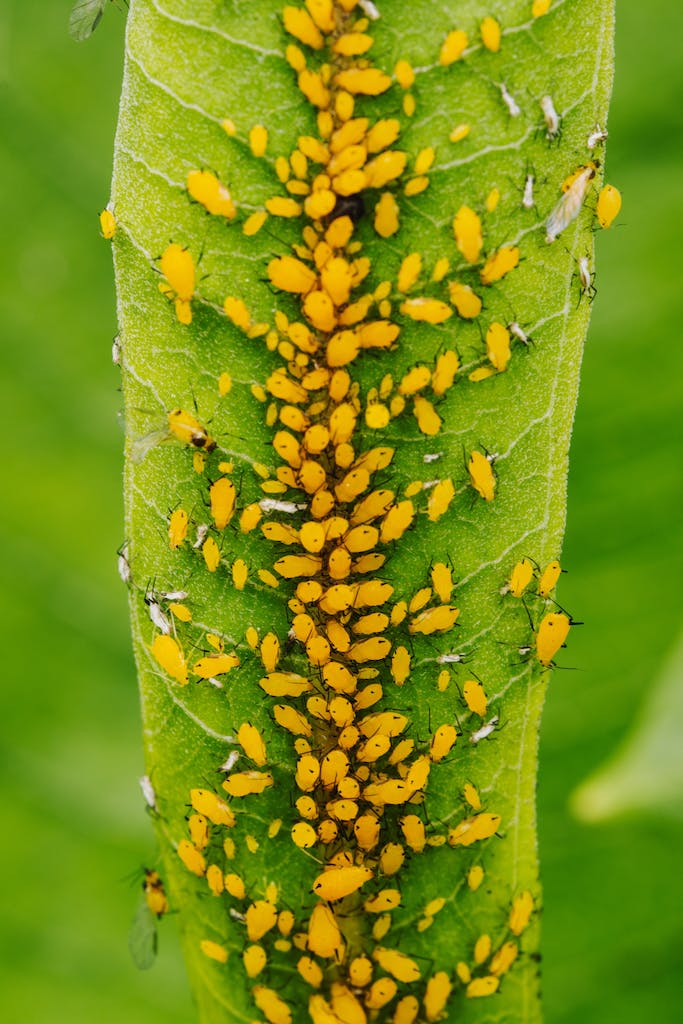
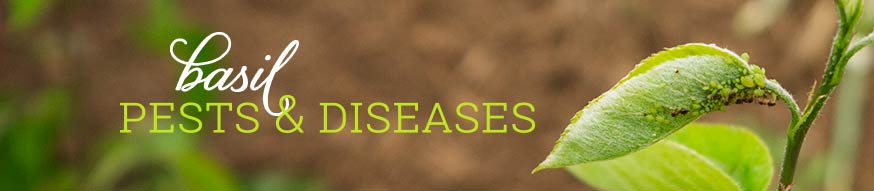
- Aphids – Description: Small sap-sucking insects that proliferate on young plant stems and the underside of young leaves. Symptoms: Sticky leaves; curled leaves; weakened, limp or dying plants despite adequate water and nutrition. Organic Treatment: insecticidal soaps, horticultural oil sprays, organic insecticides (neem, pyrethrin, etc.). The more time you can get your seedlings outdoors, the less problems you’ll have from aphids. Aphids are a favorite snack for ladybugs, parasitoid wasps and other predatory insects.
- White Flies – Description: Small, white flies that proliferate underneath leaves. Symptoms and Organic Treatment: Same as aphids (above).
- Fungus Gnats – Description: Small dark-colored gnats; the small, white-colored larvae live in soil and eat the roots of young seedlings. Symptoms: Seedling growth rate slows and seedlings eventually die if untreated. Organic Treatment: For prevention, we’ve had success by mixing diatomaceous earth into our potting soil. For treatment after noticing a fungus gnat problem, we’ve had the most success by adding beneficial nematodes (specifically Steinernema feltiae or S. carpocapsae) to our potting soil.
- Damping Off – Description: Death of young seedlings caused by fungal disease. Symptoms: Young seedlings wither and die, sometimes suddenly. Organic Treatment: Prevention is the best cure for damping off. Use a sterile potting mix; sterilize your reused seed trays before using them; occasionally water your seedlings with a 10 parts water: 1 part hydrogen peroxide mixture; don’t overwater; try to keep your seedlings in an area with good air flow; if a seedling or seedling tray gets damping off, immediately remove it from your seedling area.
ref: How To Get Rid of Aphids Organically , Keeping Seedlings Healthy, 8 Ways To Kill Your Garden Seedlings.
After Transplanting Outdoors
Common basil disease:
- Fusarium wilt (Fusarium oxysporum f. sp. basilicum): a soil-borne fungus which can be extremely difficult to get rid of once established. Spores can overwinter in the soil and reinfect susceptible varieties of both basil and mint varieties in susequent years.
- Downy Mildew: Most commonly seen in areas of high heat and humidity.
Basil disease prevention – Basil is a fairly disease and pest-resistant plant. Most common problems reported with basil can be prevented by using the following growing techniques:
- Harvest in dry weather. Don’t harvest during wet/rainy weather. For up to 24 hours after your basil’s stems or leaves have been cut, it’s still healing so moisture on the open wounds increases the likelihood of infection from certain diseases like grey mold (Botrytis cinerea).
- Top dress with mulch or wood chips. Make sure you top-dress with a few inches of wood chip mulch on your garden beds and around your basil plants. The wood chips help maintain even soil temperatures, soil moisture, provide a slow-release fertilizer and prevent soil-borne pathogens from splashing on your basil leaves when it rains.
Cornell University has an excellent guide outlining diagnostic and management strategies.
Basil Pests:
Pest Identification & Treatment – If you’re trying to ID a particular basil pest or figure out how to address the problem using organic solutions, Clemson University Extension has an excellent overview of the most common basil pests along with various organic prevention and management techniques.
Remember…
A healthy garden needs pests. Pest species provide food for beneficial species. A garden ecosystem that’s teeming with life will tend to hold the population of any one species in check. We’ve found that by focusing on improving our soil fertility and using polyculture plant systems that attract and support a wide variety of insects, we’ve virtually eliminated all pest and disease problems from our garden.
Please be thoughtful in your approach to potential problems. Is your soil healthy and teeming with microbial life? Have you planted other beneficial plants throughout your garden system that might help with the problem? If you wait a few days, will the “pest” become the food of a predator? Observe your garden system and think holistically before taking any action that could disrupt the web of life (pesticides kill beneficial insects too, not just pest insects; fungicides kill beneficial funguses too, not just “bad” funguses; etc). Personally, we’d rather lose a plant than accidentally kill a colony of nearby bees or other pollinators.
Section 8: Harvesting basil
When to Harvest basil
If we just need a few basil leaves for a dish, we’ll simply pluck off however many we need at the leaf stem as-needed. However, if we need a bunch of basil (like when we’re making pesto), we’ll trim off the ends of branches, leaving behind enough foliage so the plants can continue to grow and produce more leaves.
We sometimes will harvest the flowering stalks and add them to a cut flower arrangement. They make a great filler!
A few other harvesting notes and tips:
- Removing new flower stalks – Bees love basil flowers. Basil flowers eventually make basil seeds. Basil flowers are actually quite delicious. However, if you want to maximize leaf production and/or extend the length of time that you’re growing basil leaves, you can do that by not allowing the plants to form flower stalks. Simply pinch off or cut off the new flower stalks as they start to emerge.
- Harvest In Dry Weather – As mentioned in Pests & Diseases section, don’t harvest your basil during wet/rainy weather. For up to 24 hours after your basil’s stems or leaves have been cut, it’s still healing so moisture on the open wounds increases the likelihood of infection from certain diseases like grey mold (Botrytis cinerea).
- Storing basil leaves – Fresh basil leaves do not store very well, even in a refrigerator. If you don’t plan to eat your basil leaves within a couple days of harvesting them, wait to pick them until you can eat them shortly after harvest.
- Cooking basil – Basil’s wonderful flavor comes from its volatile oils. Unfortunately, those oils break down quickly under heat, which makes basil lose its flavor. So, to be sure to get the most intense flavor from your basil, only add it at the very end of the cooking process.
- Drying basil – Basil leaves dry well and can retain their flavor (properly stored) for up to a year. A food dehydrator at less than 125 ºF is best but you can also hand the plants indoors to dry. Once the leaves are completely dried out, they can be easily crumbled for dried herbs. Store them in an airtight container such as a canning jar.
Section 9: Saving basil Seeds
Seed saving is a critical step for ensuring that our seeds are passed down from generation to generation, so please give it a try and also be sure to share your seeds with other people! Another benefit: seeds you’ve properly saved from your own garden will be better adapted to your specific growing environment via natural epigenetic processes.
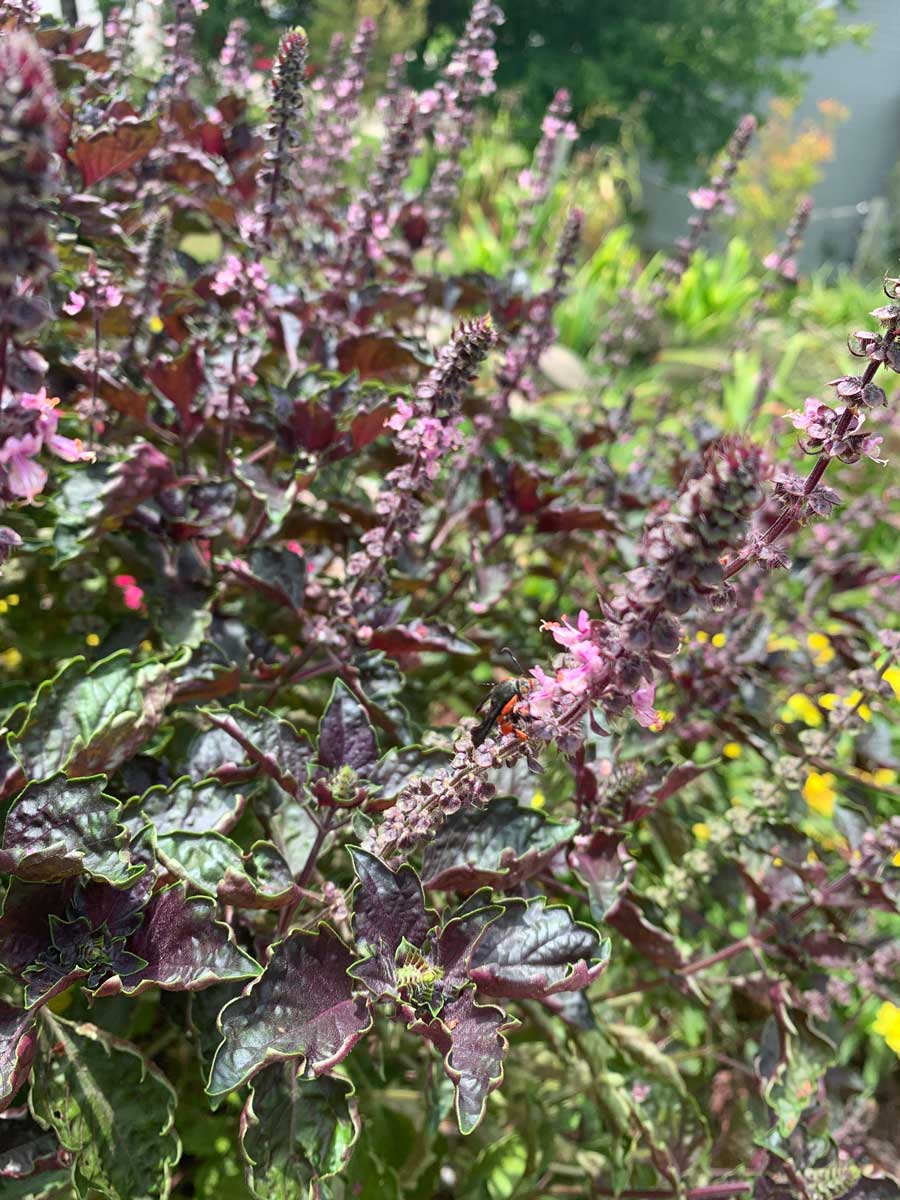
Basil is a heat-loving annual that will produce flowers when it matures in the summer. You can save your new, open-pollinated GrowJourney basil seeds as follows:
- Select Healthiest, Best Tasting Plants – Thin your basil down to the strongest, healthiest plants that you think have the best flavor. If all your basil plants look equally healthy and taste great, then wonderful – more healthy plants for your pollinators to use to make new seeds!
- Avoid Cross Pollination – Basil is insect pollinated, so if you want to save seed that is genetically true to the parent plants, only grow one type of basil within 150 feet. If you grow multiple varieties of basil within close proximity to each other, you’ll likely end up with hybrid varieties with unpredictable flavor and growth profiles—it’s a bit like rolling dice, but you could end up with your own “new heirloom” variety after a few generations.
- Harvest Seeds – Once the tiny basil flowers have been pollinated, mature seeds will begin to form. Each basil seed capsule contains four basil seeds, so you can save loads of seeds off of each plant. Allow the seeds to fully mature and dry on the plant (they’ll turn brown). Simply cut the entire seed stalk at its base and store it indoors in a dry location for 2-3 weeks, allowing the tiny seeds to fully dry and mature.
- Thresh and Store Seeds For the Future – Once dried, the seeds can easily be removed from the capsules on the flower stalk with a vigorous shaking or rubbing between your hands. Remove any extra plant debris as desired by hand, with a fan or by gently blowing on the pile of seeds and debris—the heavier seeds will stay put and the debris will be blown off. Store your basil seeds in an airtight container (add rice or silica packages to hold any moisture). You can also store the seeds in envelopes, although this will make them more susceptible to moisture damage over the course of several years.
Properly saved and stored in a cool, dry environment, your new basil seeds can remain viable (e.g. able to be grown) for 3 years. Plant and share them so the GrowJourney continues!
Section 10: Additional Resources:
- How To Get Rid of Aphids Organically
- Keeping Seedlings Healthy
- 8 Ways To Kill Your Garden Seedlings
- How to make your own DIY indoor grow light system
- Complete guide to seed starting (with video classes)
- Top 5 ways to prevent or stop plant diseases in your organic garden


Shop our store!
No more choice overload. With all products carefully curated by our expert team, the GrowJourney store has the basics you need to get growing, organically. Seed starting supplies, gardening books, tools, and more!
As an Amazon Associate, GrowJourney earns from qualifying purchases. Read more: terms of service.