

DIY: How to build a pea trellis – 6 FREE & easy designs!
As an Amazon Associate, GrowJourney earns from qualifying purchases. Read more: terms of service.
If you and your family love peas as much as my family does, you’re probably trying to find ways to maximize the amount of fresh peas you can grow in your garden. Learning how to build different types of DIY pea trellises is a great way to accomplish that goal.
In this article, you’ll find out how to make a variety of different pea trellises that are: a) easy to make, and b) low-cost or potentially even free, so that you can grow the most garden peas ever no matter your handiness level or budget!

Before we dive into how to make the perfect pea trellis for your garden, there’s some important information you should know first:
Do peas need a trellis?
All vining peas need to be grown on a trellis for best results. Technically, vining pea plants can mound and grow across the ground without a trellis, but doing so will:
- take up more room in your garden (vertical gardening takes up less space);
- reduce production due to less sunlight exposure;
- make harvesting more difficult.
There are some varieties of bush peas which are low-growing and self-supporting, e.g. they don’t require a trellis or other support. When buying pea seeds to grow, always be sure to read the seed packet or online description so you know the plant’s growth habit and can plan accordingly.
What types of peas are there?
The types of peas popular for edible consumption generally fall into the following categories:
- snap peas – plump, sweet and juicy peas you eat whole straight off the plant;
- shelling peas – pods are usually too fibrous to eat but they contain delicious peas inside (this is the pea type used to produce the bags of frozen peas you get at the grocery store);
- snow peas – flat-shaped peas popular in Asian stir fries;
- soup peas – grown to produce dried peas for soups, stews, etc; and
- green & garnish peas – produce delicious greens for salads and/or attractive pea tendrils for garnishes.
There can be some overlap between these pea categories. For instance, our favorite pea variety to grow in the winter in our relatively mild Zone 8a climate is Austrian winter peas, which produce delicious greens/growth tips and elegant tendrils. Austrian winter pea plants don’t produce great pods for fresh eating, but if the pods are left to mature their dried peas make a good soup pea for split pea soup or other recipes.
Austrian winter peas are the most cold-hardy pea we know of and the only variety we can grow in the winter. In fall and spring, we grow other types of peas. However, our summers are too hot to grow peas.
Best part: we switch to another legume — vining beans — for our summer crops using the exact same trellises we use to grow pea plants during the cool months! As the pea plants die out, the bean plants are already growing and starting to fill in the trellises.
Are sweet peas edible?
Despite their name, sweet pea plants (Lathyrus odoratus) are poisonous, not edible. They’re grown for ornamental purposes, particularly their beautiful flowers.
Depending on the variety of sweet pea, they can also benefit from growing on a trellis, but you do not want to grow them near your edible plants especially if you have young children who might confuse them with edible peas.
How tall do peas grow?
Bush pea varieties typically don’t surpass about 3′ in height. However, some vining pea varieties can reach 8′ in height.
Two important things to note here:
- Make sure you know the exact variety/cultivar of pea variety you’re growing and its mature height (the seed packet or online description should give you this info). Vining pea varieties can be anywhere from 2-8′ tall at maturity.
- An 8′ tall pea plant doesn’t necessarily need an 8′ tall trellis. Why? You can weave and wind your pea plant around a trellis using the horizontal plane to reduce how tall the plant reaches before it matures/dies.
So how tall should your pea trellis be?
With the above context in mind, anywhere between 4-6′ (measured from the ground to the top of the trellis) is an ideal height range for a pea trellis for larger varieties of vining peas. For smaller vining pea varieties, you can get away with a 2-3′ tall trellis.
*Note: Some types of pea trellises will need to be deeply anchored into the ground to provide sturdy support and the below-ground portion of the trellis doesn’t count towards the height.
Do pea plants make their own fertilizer?
Like other legumes, pea plants can convert atmospheric nitrogen (N2) which plants can’t synthesize into plant-available nitrogen (NH3) by virtue of their symbiotic relationship with Rhizobium bacteria. This process is called “nitrogen fixation,” and it allows peas to essentially grow their own nitrogen fertilizer.
That’s one of the reasons why legumes tend to be low-maintenance crops that don’t require much if any fertilizer when grown in good soil. You still may want and need to amend your garden soil with compost or worm castings to make sure your pea plants have the other macro and micronutrients they need and are growing in biologically rich soil to optimize their health and nutrient-density.
How to build a pea trellis – 6 free and easy DIY options
Do you have vining pea varieties you want to grow on a trellis without spending a bunch of money? Great!
Let’s review some inexpensive (and possibly free!) trellis options. And you aren’t limited to one type of trellis – we use multiple in our garden.
Option 1: Use existing chain link fence
Do you have a chain link fence on your property that gets 6+ hours of direct sunlight?
If yes, then you already have a ready-made pea trellis ready to go! Amend some holes at the base of the fence with compost and worm castings before sowing seeds. Or place pots/containers at the base of the fence and sow your pea seeds there.
A chain link fence allows nice air flow through the pea plants and creates a heavy-duty trellis that you don’t have to worry about blowing over during a storm.

Option 2: Use existing wood fence with added twine grids
If you have a wood fence, you can easily modify it to house a pea trellis. Install nails or screws in a grid pattern (see below) then tie jute twine (or other biodegradable plant-based twine) between the hardware to support the pea plants as they grow.
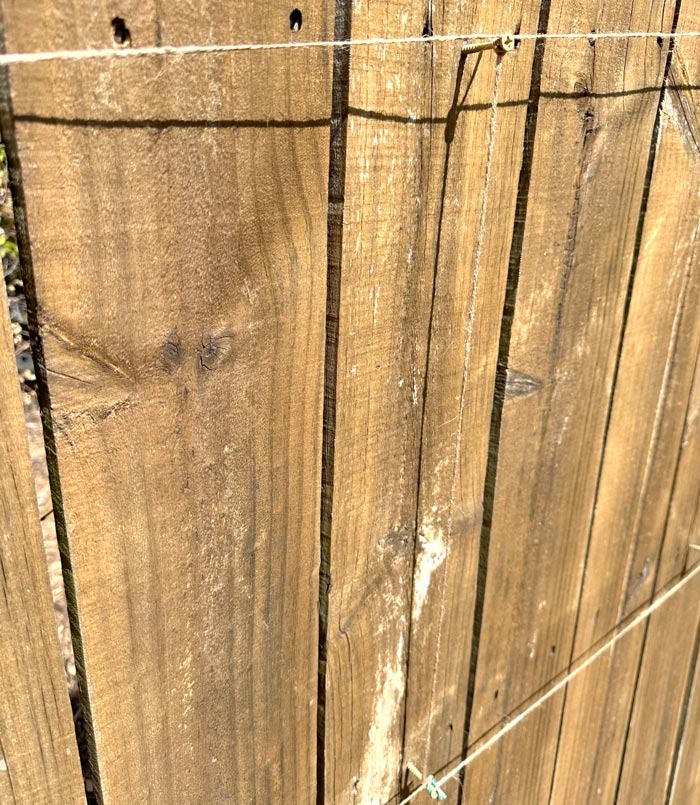
Twine is easier than wire for the pea tendrils to grab hold of and helps ensure the plants don’t get blown off the trellis during strong winds. In our experience, twine can last from spring through fall before having to be replaced the following year.
The one downside of using a wood fence for a pea trellis is it doesn’t allow good airflow around the plants and it can also absorb and reflect a lot of heat from the sun, which can stress the plants. Before using a wood fence for a trellis, make sure the amount of sun exposure is adequate but not too intense (trial and error can be your friend here!).
Option 3: Use plant cages you already have or make custom ones
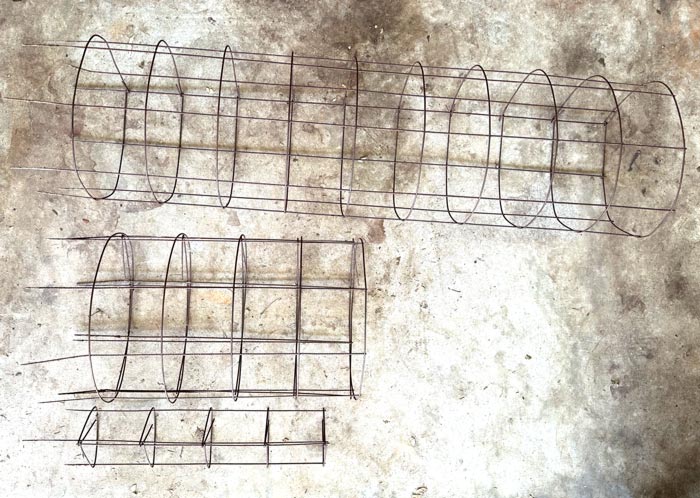
Do you have unused plant cages laying around? Good news: plant cages also make great pea trellises.
Check out our DIY tomato cage article to make your own sturdy plant cages that will last forever. Best of all: you can make them to virtually any size and shape you want.
Option 4: Use fruit and nut trees
If you’re into permaculture, you might be familiar with the idea of stacked functions and the seven layers of a productive “forest garden” (eight if you count edible mushrooms). The seventh layer in a forest garden is typically comprised of edible climbing plants.
If you have fruit or nut trees, you can use those trees as a trellis for your pea plants in late winter through spring (depending on your climate), direct-sowing the pea seeds at the base of the trees while they’re still dormant.
This technique works best on goldilocks-sized trees: not too small not too large. If your pea plants need additional support to grip on to as they climb the tree trunk, you could tie twine from the bottom branches and anchor it to the ground with landscape spikes.
Side benefit: Since peas produce and store nitrogen in their roots (as discussed previously), when the plants die out, they’ll provide an extra boost of fertilizer to your trees come summer time!
Option 5: Construct a square- or rectangular-frame pea trellis (with bamboo or wooden tomato stakes)

Square and rectangular-frame pea trellises look and work great on the border of a raised or in-ground bed or against the wall of a house. They also work great if you want to do rows of peas.

The only downside is they might not be the most sturdy trellis option if you live in an area that regularly experiences strong winds. So if you build a square frame pea trellis, you really want to make sure it’s well-anchored in the ground by utilizing one or multiple of the following techniques:
- hammer the base of the frames deep into the ground,
- add additional A-frame supports to the side frames;
- use supplemental anchors to add structural support (such as long rebar attached to the trellis base via zip ties or metal wire).
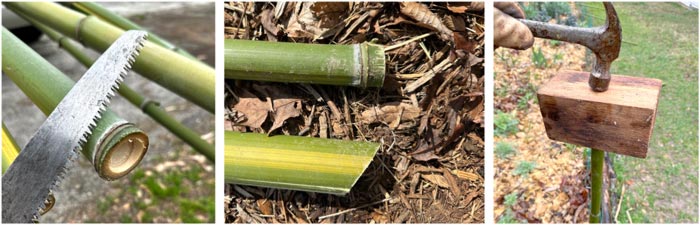
Alternatively, if you’re REALLY committed to putting in a permanent square frame trellis into a certain spot in your garden, you could use 4×4 lumber anchored with concrete footers and cattle panel or concrete reinforcing wire hung between the wooden frames.
What about an arched cattle panel trellis? We wouldn’t recommend that option specifically for peas since the plants won’t grow large enough to fill it out.
Option 6: Construct a teepee pea trellis with bamboo poles or tree cuttings
Looking for a super easy DIY trellis for your pea plants? Or want a rustic trellis look? A simple teepee trellis may be for you!
To make a teepee trellis, all you need is three or more sticks and some garden twine… Actually, you don’t even need twine depending on what you use for your framing.
For instance, if you use tree cuttings with branching tops that you can interlock together at the top of your trellis for support, you don’t necessarily need to tie the top of the trellis together with twine or provide extra support for the peas to climb up.
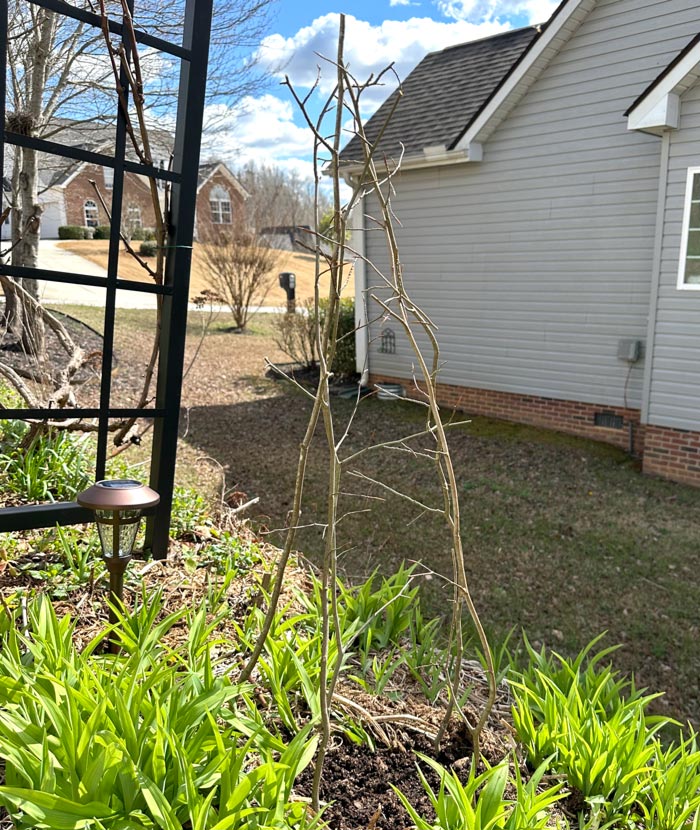
However, if you want to make a bamboo trellis teepee using bamboo posts, you’ll need to: a) tie the posts together at the top of the frame, and b) provide layers of twine going up the trellis to provide anchors for the pea tendrils to wrap around (they’ll have trouble gripping on to smooth bamboo).
When making a teepee trellis, it’s also important to make sure you hammer or punch each part of the frame into the ground to give it structural stability. If the bottom of the trellis isn’t anchored to the ground, you run the risk of it getting blown over during storms and heavy winds.
Final tip (especially if you have kids!): be sure to make your teepee pea trellis magical by leaving one side of the trellis open as a “door” for kids to go inside for fun or to harvest and enjoy a handful of peas.
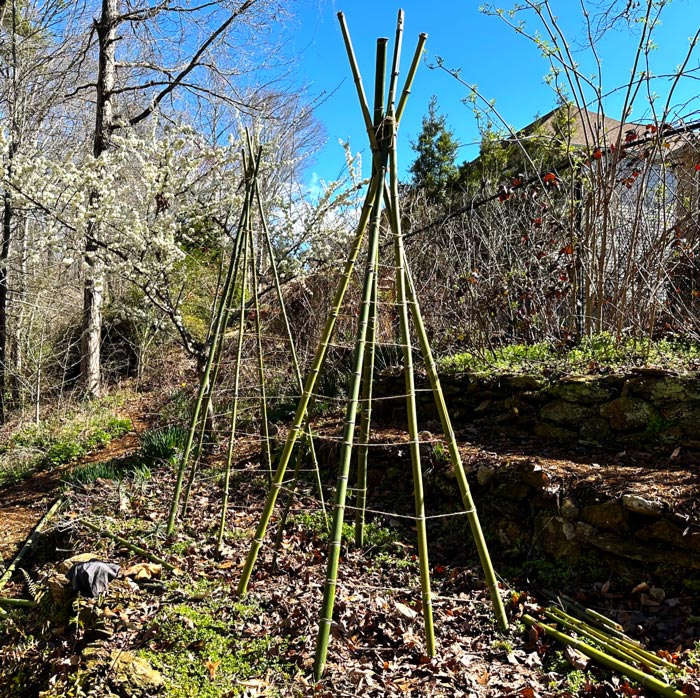
Using the various types of pea trellis systems outlined in this article has allowed our family to maximize the pea production in our growing space. We hope you and your family reap the same benefits and have your best pea season ever!
Happy gardening!
Related articles you’ll love:
- How to grow Austrian winter peas delicious cool season greens
- How to grow an endless supply of pea greens indoors (on our sister site, Tyrant Farms)




In option 1, can you tell me where the grape arbor is from?
Hi Brooke! We got out metal grape arbor from Wayfair a few years ago. They have a nice selection.